michellesnoopy Instagram

Showing posts with label nail art. Show all posts

Wednesday, January 21, 2015

Nail Resolution


Holla!!

I got this Sephora Nail Polish collection from my dear colleague who knew I love to colour other people's fingers. Haha! I do have a stash of nail polishes in the office. In fact, It's getting packed if I'm gonna get more of these! >.<

Okay. I love the colours! I love how it sets so quick on my nails dries up pretty quick. Love the simple instructed designs and tutorials too! The above nail was my first on in 2015. Hopefully more to come! *fingers crossed*

Will try another design again for this weekend! :*


Sorry I'm too caught up with work cause Chinese New Year is coming very soon! >.< 


michellesnoopy


Wednesday, August 06, 2014

Nail Tell #13 - Orange and Yellow Chevron Nails


Hola!!!

I've been practising my chevron nails by using scotch tapes and cute it with a chevron scissors. Up to date, this is my best ones.

Products Used:-

1. Yellow and Orange nail polish - elianto
2. White nail polish - Bloop
3. Base coat - Sally Hansen
4. Top Coat - Seche Vite
5. Scotch tape

Once you're done with applying the topcoat over your chevron tapes, remove them and remove extra polish all over the finger. The important part comes in now. There will be flaws when you remove the tape so what I did was I took some white polish to enhance the chevron shapes. Or else it will look like a crooked chevron instead of a really defined design.

My mood wasn't at its best before I did this. And they say colours will affect your mood, I say it's true. Looking at these bright and happy colours did made my day passed easier! Hope you guys enjoy this.


michellesnoopy


Monday, July 21, 2014

Nail Tell #11 - Nail Polish/Art Protector


Hola!!

It's a fine morning,
You get ready with your perfect outfit for your perfect date,
You got your makeup done,
And last but not least, nail time,
But then FUUUUUUU! One or two of your nail art got smudged when you just wanted to pull a few strands of hair to the back!

Dang! You wished you've never painted your nails at the first place.

So..... Yeap. This scenario is always happening to me. Hmph. Maybe I grew so familiar to that scenario I just removed it when it happened.

When Polishville sent me these, I thought it wouldn't help at all. But it did. Removing your nail colours or arts after you've put so much time on it is just frustrating. So I thought "Why not give this a try?". In condition that it has to be clipped properly and precisely on every finger. Then you won't need to worry about getting your nail art smudged.

The role is the same of those toe separators but this looks cooler. Haha.. Polishville is selling these too, at a very reasonable price. You guys should check it out. It does protect your nails and wouldn't ruin your perfect day! Get it from


Website  Polishville
Facebook Polishville Page


michellesnoopy


Friday, July 04, 2014

Nail Tell #10 - Gwen Stefani for OPI Swatch

4 In The Morning


Hey Baby


Hola!

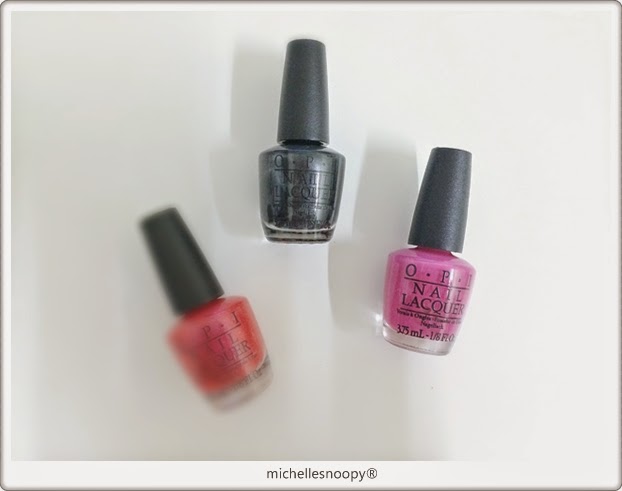
Polishville is generous enough to send another nail polishes for me to swatch! And this time it's from OPI! So I picked the Gwen Stefani for OPI as well as from another collection which I will do a swatch for next post. I love Gwen's collection. The 4 In The Morning looks like black but it's dark ash black. This colour is so special as it's effect is "matte with subtle gleam" which I was so curious about. It dries very quick and NO TOP COAT NEEDED!

Another colour which I picked was Hey Baby - full, smooth coverage and high shine. Hands down on this. I'm not a fan of pink but the colour after my swatch is awesomely pretty! For girls who loves pink, this is IT

I also did a quick art on both colours. The chevron art was hand drawn using Hey Baby, while the polka dots was drawn with 4 In The Morning. Dries fast alone, faster with a good deal of top coat. Hey Baby glosses pretty well. Love it!

You can get it from Polishville from the link provided below. Enjoy!


Webpage Polishville


michellesnoopy


Thursday, June 26, 2014

Nail Tell #9 - Polishville Swatch Part II


Hola!!

My second part of swatch on another nail polish delivered by Polishville! First part HERE was about China Glaze's nail polish. This time, it's about L.A Colours FlashPop! As the name stated 'flash', of course it's more on neon colours. But in this swatch I didn't apply any white polish as base.

NOTE: Neon colours pops when you apply white nail polish before the neon colours.

And it comes with glitters on the other side of the polish! 2-in-1 polish! How great! So I did  a quick swatch on both colour and glitter. My second picture shows only one coat of the colour. When you apply the second coat, it covers your nails completely.

So far I got nothing to complain about this nail polish. It's just as easy as ABC. You can get it from Polishville's website! They are really nice (communicating via emails) and fast in delivery too. :)

Find them here!

Website ☞ Polishville 
Facebook Page  Polishville Facebook 

Thank you, Polishville for these awesome nail polishes! ♥(ˆ⌣ˆԅ)


michellesnoopy


Saturday, June 14, 2014

Nail Tell #8 - 2014 FIFA World Cup


Hola!!

It's the Brazil World Cup 2014 opening match today! And let the football craziness begins! Any girls got ditched for this world cup? LOL! So I googled Brazil flag and I decided to do a nail art with the flag as a reference.

Products used:-

1. Green nail polish from Unknown
2. Yellow, Blue and White from acrylic paint

Basically it's not difficult to complete this look. Green base and then just the flag. for the other three fingers I did a half nail as I wanted a simple nail art. Still need more practice on my strokes!


michellesnoopy


Sunday, June 08, 2014

Nail Tell #7 - Polishville Swatch Part I


Hola!

This time round I'm doing a swatch for the nail polish I received from Polishville. I was asked to pick a colour among four and I chose Be More Pacific. Was attracted to the colour and still am! Proly it's summer (technically it is all year long) but let's just pretend we have four seasons here. XD Wtm..

The colour is definitely vibrant and suits the summer mood! Really love this colour. I also did a quick and easy nail art but I'll keep it for Part II cause this is for swatch purpose only. Hehe..

Oh oh! Polishville also sent me a couple of mini surprises! One of them was Seche Vite's Dry Fast top coat! I've always wanted to get one and thanks to Polishville I don't need to (for now). It really did a good job based on what they've written on the bottle - DRY FAST. It's THE real deal. Getting this for good in future once I finished this bottle.

Well, that's it for now as I'll keep you surprised for my Part II. And do pay Polishville a visit too! You might get the nail products you're looking for! Thank you very much, Poshville for sending me these products! And I'll be back for the next round. 


Polishville Website ☞ Polishville 
About Polishville here ☞ About Us
Polishville Facebook Page ☞  Facebook


michellesnoopy


Tuesday, May 27, 2014

Nail Tell #6 - Cupcakes


Hola!!

Cupcakes! Cupcakes! Cupcakes! I love cupcakes! I posted this in my fb album but no time to write about this. So here it is!

The main idea of this nail art is you don't have to be consistent with it. Consistent cupcakes are not yummy,anyway. You can pick any colour that you like and I've picked blue, green, pink, yellow and purple.


Step by step:-

#1. Start off with a base coat (as always).
#2. Colour half of the tip with your preferred colour.
#3. Colour the top of the cupcake with white/brown depending on what cream would you like to be on top of your cupcake.
#4. Use one shade darker than each colour and draw horizontal stripes on the bottom of the cupcakes.
#5. Using the smallest dotting tool, add some dots on the white cream area as sprinkles.
#6. Add a dot of cherry with a dotting tool on top as the finishing design.
#7. Finish off with a layer of top coat.


So what think you? Like?


michellesnoopy


Friday, May 09, 2014

Nail Tell #5 - Mother's Day 2014


Hola!

Mother's day is on 11th May (in Malaysia at least)! But too bad my mum is not here. She was, two weeks ago when she stayed for 2 more days after her Korea trip. I googled "Mother's day nail art" but couldn't find one to re-create. So I did one on my own. 

Products used:-

1. Two shades of pink as base (light from OPI, dark from unknown),
2. White MUM alphabets from Bourjois,
3. Red hearts from OPI,
4. Light pink hearts from the same light base colour,
5. Roses from both dark base colour and #3,
6. Green leaves from unknown,
7. Dotting tools.


There's no tip or tricks to this one basically. The roses are simple swirls of two colour combined together. What do you think?

Anyway, HAPPY MOTHER'S DAY and enjoy the weekend with your mumsy!


michellesnoopy


Wednesday, April 16, 2014

Nail Tell #4 - Gold Striper Tape


Hola!

I haven't been spending time on my nail art practice but this week everything resume as normal! This was last week's nail art. Something really simply by using only few shades of orange nail polishes and gold colour striper tape.

First time using the tape and it was pretty handy compared to drawing those lines on the nails as they are definitely more accurate and straight..

And pretty to look at too. 

Hahah!


I feel that orange it not an easy colour on my hands. Maybe I'm not suitable for orange. But I love the colour!! Wtm.. Another thing about the striper tape is I applied two coats of top coat just in case the tape peels off easily. I read it online (and watch YouTube) that it comes off pretty easy. Lasts only for few days.


So yea... Be back soon! Can't wait April to end! X(


michellesnoopy


Saturday, April 05, 2014

Nail Tell #3 - Cath Kidston Inspired Flowers.


Hola!

Nail post this time. This was a request from a close friend of mine. She wanted a Cath Kidston inspired nails so I did a little research online and decided to try this one.

As you can tell, the attention seeker for this nail art is the flowers/roses (whichever you want it to be called). And the most important tool is a rounded and a really fine dotting tool. The leaves and polka dots can be easily done with a fine brush.

The trick is to blend the colour of the flower with a hint of white (in a swirl) while the first colour is still wet. I know a lot of YouTube videos shows this pattern by using a brush but I personally think this method is more controllable and I have better confidence using this method.

Hope you guys like this!


michellesnoopy